Blocking Hats by Hand
15. The Blocker Shapes and Styles the Hats
Blocking is the hand process by which a hat is given its shape. Just as a fine diamond can be enhanced or spoiled by the diamond cutter, a beautiful Montecristi hat body can be enhanced or spoiled by how it is shaped and finished.
Blocking. It is such an inelegant, abrupt name for such an elegantly complex process of myriad subtleties.
Blocking Montecristi hats has little in common with blocking felt hats. It is a universe unto itself. I block only “Panama” hats, specializing in Montecristi hats. They make me crazy. We’ll get to that later.
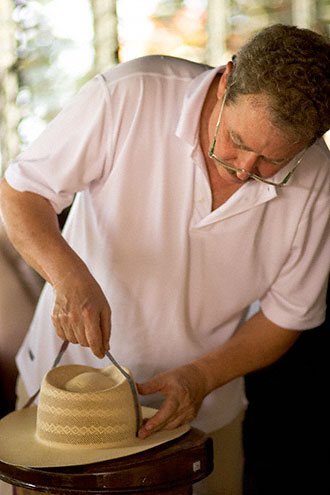
© 2005 Roff Smith
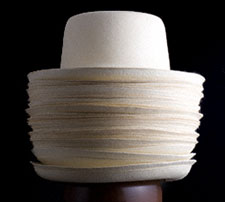
This photo (left, top) shows a stack of unblocked Montecristi hats. That is how they look when they leave Montecristi. That is how they look here, on the shelves in my workshop. As you can see, they have not yet been styled. They are just a generic hat shape.
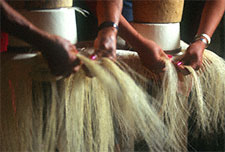
Weavers do not weave the hats into the different style shapes. The weavers weave a generic hat shape. In this photo (left, middle) you can see that the crowns of the two hats have been woven over flat-topped, round wood forms, and the weavers are now weaving the brims.
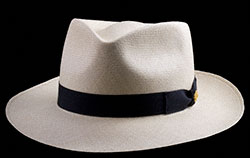
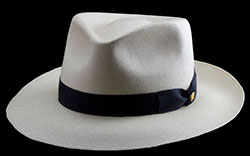
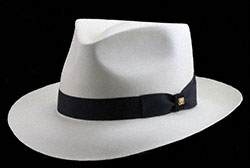
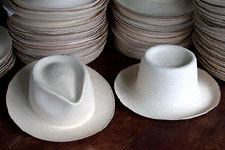
The blocker gives the hats their shapes. The blocker defines their styles. In this photo (left, bottom), you can see one unblocked hat, still shaped as it was when I received it, and a second hat that has been blocked as a Classic Fedora. Can you tell which is which? Thought so. You’re a natural.
The hats in the stack (photo left, top) all have brims 2½ to 3 inches wide. If I selected one, I could block it as a Classic Fedora, Gatsby Fedora, Havana Fedora, Montego Bay Fedora, Optimo, or several other styles. To block a Plantation, Monte Carlo, or other wide-brim style, I would have to go get a different stack of hats.
Let’s walk through the basics of blocking a Montecristi hat and I’ll point out the crazy-making parts of it as we go.
1. Choosing which hat to block for you
Suppose you ordered a Classic Fedora. I sent you five size test bands to try on. You confirmed by phone or email that your best fit is 23¼ inches. You told me, when you placed your order, that you are 6′ 2″ about 200 pounds. Good to know. I like to have a sense of your physical proportion to guide me as I choose and block a hat.
I sort my unblocked Montecristi hats, more than 2000 of them, by brim width and weave count. If you ordered a $600 Classic Fedora, I would choose your hat from those in the photo above (top of left column above). If you ordered a $1000 Classic Fedora, I would select from a different stack.
If you ordered a Classic Fedora, the finest available in your size, I would focus my attention within a “small” (world’s largest by far) collection of the very finest Montecristi hats woven during the past ten years, fewer than fifty hats, priced between $10,000 and $25,000. I would select those hats, if any, that would block to your size, style preference, and a flattering proportion. We would discuss those hats, probably at some length. I would recommend the hat that I think would block to the best proportions for you and the style you have chosen. Sadly, that might not be the most expensive.
I know who the best weaver is – Simón Espinal. I buy ALL of his hats. And because I pay higher prices to weavers than other buyers, the best weavers generally offer their hats to me first. I have heard some alarming stories of people paying many thousands of dollars for hats represented to be “the very finest” when, in fact, they were merely the very finest the other dealer has available, perhaps the finest that dealer has ever seen. But they would not be as fine as my finest. A comparable hat from me probably would have cost significantly less, and the weaver would have received significantly more income. I am absolutely certain no one anywhere has finer Montecristi hats than my finest. One seller actually claimed to have “the finest Panama hat it is possible to weave.” Bullshit. I offered to bet him $20,000 that his finest possible hat was not as fine as any of several hats I have. He did not take the bet.
Okay, let’s get back to selecting which hat to block for you.
When choosing the best hat for you, I will put serious candidates over the block I will use, verifying that each would be likely to block to the size and proportions we have in mind. This is not a reliable test.
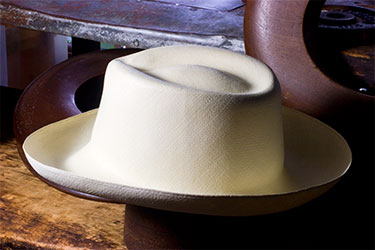
For you (size as given above), I will be looking for a hat body that will yield, when blocked, a Classic Fedora with a brim width of 2¾ to 3 inches and a crown height of 43⁄8 to 4½ inches. If you have requested different dimensions, then I will be looking for whatever we agreed upon. If you are a different head and/or body size, I may be looking for something different.
It is much simpler to locate the right price hat than the right proportion hat. Measuring an unblocked hat is an exercise in optimism, or futility. When the hat is steamed and pulled onto the block, the proportions will change, sometimes dramatically. The only way to know, for certain, what will happen is to make it happen.
2. Which end is up?
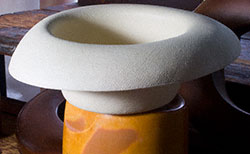
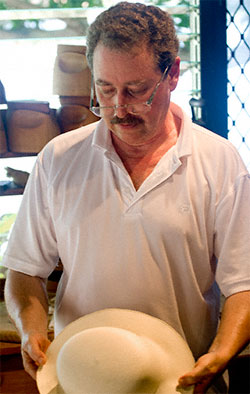
above © 2005 Roff Smith
Well, that part is easy. The hats have an obvious top and bottom. But choosing which is the front of the hat and which is the back is not at all obvious.
First, I look at the brim. Brims are never the exact same width all around the hat. Some are blessedly close.
The brim edges are never perfectly even and rounded. Again, some are blessedly close.
Naturally, I try to put the best face forward for any hat I am blocking. Every hat requires study, analysis, judgment. Luck helps. Experience helps more.
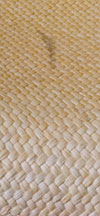
Imagine a diamond cutter studying an uncut diamond, trying to peer into its soul, straining to see, or to intuit, how to orient it, how to shape it, how to reveal a unique perfection within the uncut stone, as Michelangelo revealed The David within an uncut stone.
Once I have decided which part of your hat Michelangelo would put in the back, I make a pencil mark inside as a reference point, and hope I’m right.
3. Getting steamed
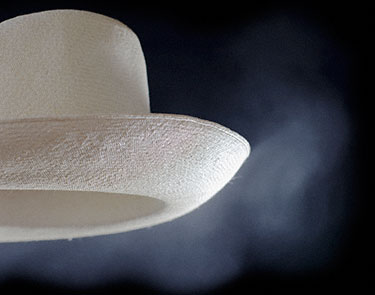
Now the real fun begins. The crown of your hat is put into the steam. Or the steam is put into the crown of your hat. Some blockers steam from outside the hat. Some steam from inside the hat. I generally steam from inside the hat, so the steam will fill the crown, warming and softening the straw evenly.
I can feel the straw becoming hotter and softer as I rotate the hat by hand to distribute the steam evenly throughout. Once it feels ready, I pull the hat onto a block.
4. Onto the block
-
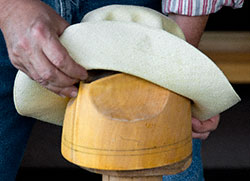
Your hat is warm and soft from the steam. I check for my pencil mark and orient the hat with the mark centered in back, then pull the hat over the block.
-
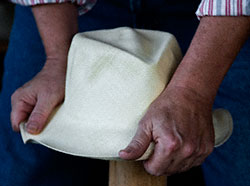
Your hat is centered over the block, front, back, left, right, then the hat is pulled onto the block.
-
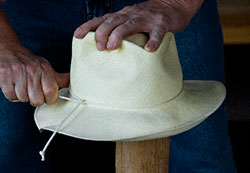
A cinch cord is put around the hat and pulled tight. This cord defines where the crown will end and the brim will begin. That place is called the break line.
-
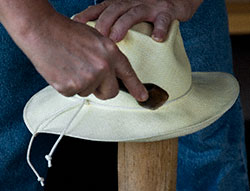
The pusher-down tool is used to push the cinch cord down so that it is level all around the hat.
-
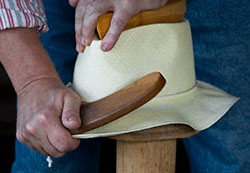
Your hat is pulled taut on the block, using just my hands some of the time and a wooden, boomerang-shaped, puller-down thing some of the time. I can feel the straw stretching to its limit as I pull evenly all around the hat.
-
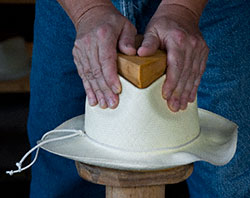
The tipper is a necessary complement to the block itself. The tipper shapes the top of the crown to the block.
6 photos in series © 2004 Matthew Klein (Thank you, Matthew.)
5. Measuring up to expectations
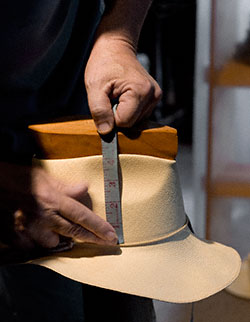
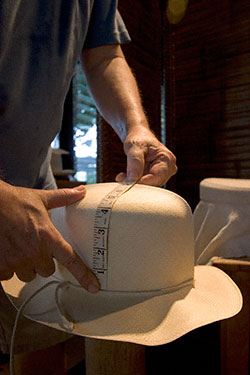
2 photos above © 2005 Roff Smith
Now the crazy-making begins in earnest.
Carpenters like to say “measure twice, cut once.” Lucky SOBs. I envy them. Under ordinary circumstances, their boards don’t change dimensions while they aren’t looking.
My #@!%& hats change dimensions continually, whether I’m looking or not.
I measure each hat before I put it into the steam. And every time I do this I can hear the hat gods snickering behind me. Because once the hat has been steamed, and I am pulling it onto the block, everything changes.
Some hats stretch a lot. Some very little. Some stretch more on one side than another. That’s always funny. Not so much, really.
After I’ve pulled and pulled and pulled, all over, all around, it’s time to measure everything again. More often than not, I have to readjust the hat’s position on the block to even it all up again. With distressing frequency, the hat no longer matches the dimensions I’m aiming for, so I have to take that hat off the block and start all over with a different hat body.
It is not unusual for me to have three or four different hats onto the block before one comes out just right. Sometimes, I might have as many as ten different hats onto the block before I find a keeper.
Yeah, I know, it sounds like I don’t know what I’m doing. I have blocked thousands of Montecristi Panama hats. If it were possible to predict the final dimensions of a hat, even an idiot would learn how, as a matter of simple self-defense. The more I know, the more I know what I don’t know. As Harry Truman said: “It’s what you learn after you know it all that really counts.”
Why are the woven hats so unpredictable?
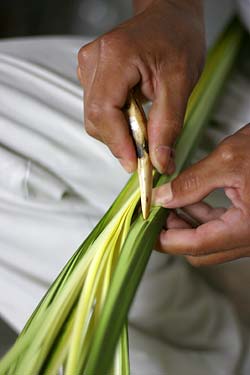
Well, let’s think about it. They are made of straw. The straw is made from naturally growing plants. There are rainy seasons and dry seasons. Some plants will receive more sunlight than others. Some will receive more, or less, water. A weaver may use material from twenty different plants to make a single hat. He will slit the straw lengthwise with his thumbnail to determine their width, then roll them between thumb and forefinger before weaving with them.What are the chances that every strand of straw is identical to every other strand in width, length, and tensile strength? Right. Zero.
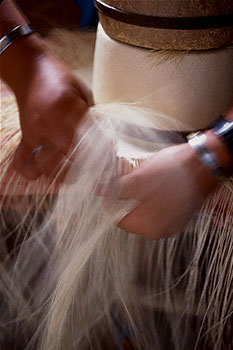
The other key variable is the weave. Some weavers pull their weave tighter than others. Two weavers might weave with the same number of rows of weave per inch horizontally, but one might weave taller rows than the other. And so on. Hats will vary from weaver to weaver.
The weaving is done by hand, a little at a time, spread out over anywhere from five weeks to five months. The weaver is human, not a NASA-calibrated precision machine. Even the same weaver will not exert the exact same amount of pull on each and every strand of straw in each and every weave action throughout a hat s/he is weaving. Perhaps s/he had more or less sleep, more or less coffee, more or less energy, today than s/he had yesterday. So, hats will have variations within the same hat.
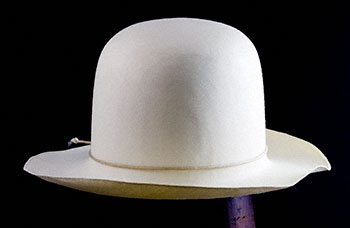
Your hat is on the block. Pulled tight. Cinched tight at the break line. Everything is measured and re-measured and re-measured again. I am satisfied that everything is as even as possible.
Now I do some really important stuff that I’m not going to bore you with (meaning I don’t really want to disclose a few critical trade secrets). After I have completed my mumbo-jumbo, oh-so-secret rituals, the hat must be allowed to dry completely on the block. This is how it “learns” the shape.
6. Drying time
It is critically important for the hats to dry completely in the shape one wants them to have. I often use two or more crown blocks to achieve a final style shape for a single hat. The hat must dry completely at each stage.
I figured out how to make a special place to put the hats to dry. I call it The HATchery. Sorry. I do enjoy my hat jokes.
Your hat is now in The Hatchery, drying. I can’t show any pictures. You know how it goes. I show a few photos of this thing I thought up and the next thing you know Billy Mays is selling them on TV, making a fortune with my idea. So no photos.
Visualize your hat in a happy place. Your hat is blissed out.
7. Surprise!
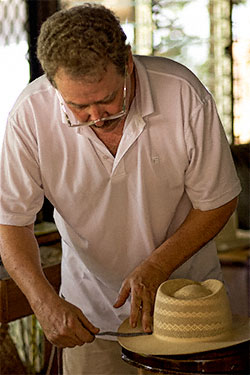
Your hat is dry. It comes out of The Hatchery. I loosen the cinch cord. I measure everything again.
If you live on the other side of the tenth fairway from me, you can probably hear this part of the process.
The hats often dry unevenly. One part shrinks more than another. Or shrinks less. Maybe some parts don’t shrink at all. Big joke. The Hat Gods laugh. I don’t.
I adjust and repeat. As many times as it takes. Sometimes I choose a different hat body and start over.
Beautiful hats don’t just fall off trees, you know.
Photo © 2005 Roff Smith

8. What’s a flange?
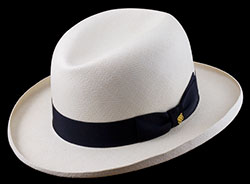

A special flange for a Homburg
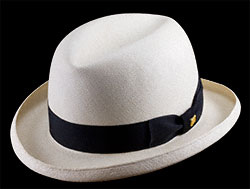

A different flange for a Homburg
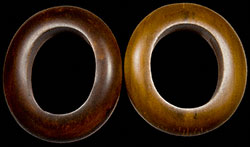
Long oval. Regular oval.
Both are for the same size head
and the same width brim.
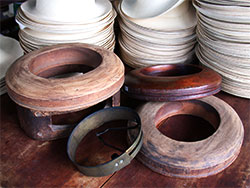
Three flanges and a band block
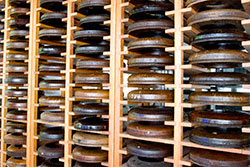
A few of my favorite flanges
Imagine hundreds of little wooden toilet seats for leprechauns. Some bigger, some smaller. Some wider, some narrower. Some long oval, some regular oval. Some special flanges for special styles.
These wooden forms, called flanges, are used to shape the brims of the hats.
Why so many? Think about it.
A snap-brim style, such as an Optimo or one of my five fedoras, will require one type of flange, while a Plantation or Monte Carlo brim style requires not just a wider flange but a different shape. A Derby or Homburg requires a completely different type of flange. There are even different types of Homburg brim shapes/styles.
Then each type of flange has to have different sizes of flanges for each different hat size. And a 2-inch brim needs a different width flange than a 2½-inch brim, or a 2¾-inch brim, or a 3-inch brim, or a…
Can’t have too many flanges.
9. Into and onto the flange
-
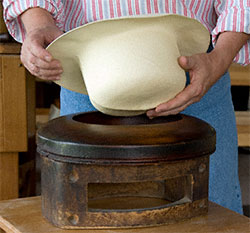
When I am satisfied with the crown shape, the hat goes crown-down into the flange.
-
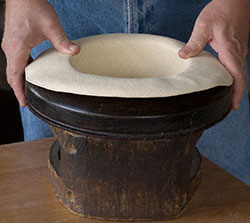
The flange must be exactly the right size, so the hat will fit into it perfectly, no gaps, no squeezing. The flange must also be the right shape, the right width.
-
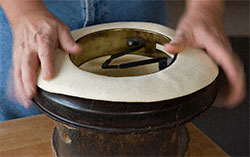
A brass band block is put inside, opened to fill the space, tightened to hold. The band block holds the hat snugly in the flange.
-
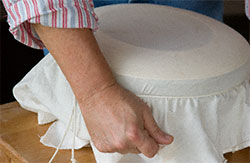
A flange cloth is pulled over the hat brim, to protect it during the next two stages. The brim is smoothed under the cloth. Then the cloth is pulled tighter than a Marine’s bunk on inspection day.
-
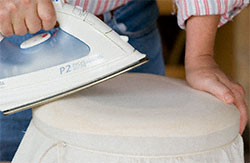
The cloth is dampened. The brim is ironed to the shape of the flange. I am fortunate to be able to iron with either hand, so I can switch off when one arm gets tired. This is not like ironing permanent press pants with a steam iron. Not even close. It’s more like an odd isometric exercise. A couple more years of ironing brims and I may head for Petaluma for the arm wrestling championships. My hands have grown enough calluses to get me into the stevedores union.
5 photos in series © 2004 Matthew Klein
10. The sandbag
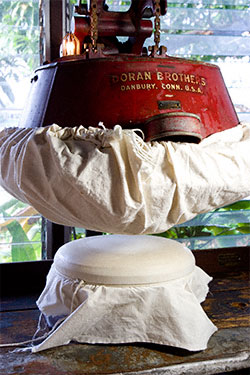
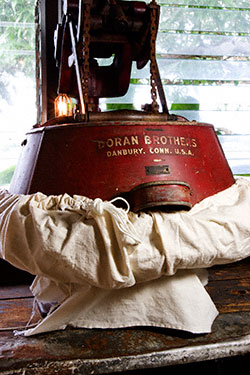
Look at this beautiful piece of equipment. You won’t find one of these at the Home Depot. This one was made by Doran Brothers of Danbury, Connecticut, which used to be one of the major capitals of the hat world almost a century ago, back when hats were serious business.
This holds 65 pounds of sand in the big red head. You can see the cotton outside cover on the bottom. There is also an asbestos cover below the cotton cover. A heating element heats the sand so that it is hot to the touch.
The head of the sandbag device is slowly lowered onto the flange. Sixty-five pounds of hot sand further smooth the brim and set the shape. The brim and flange stay under the sandbag for several minutes.
Then it’s back to The Hatchery to dry again.
Again, several days to dry in the HATchery before I can move on to the next step.
By now, you should be beginning to understand why there is no such thing as a rush job. I allow each hat time to dry at every stage. There are many stages.
Yes, I could shape a hat in one day but it would be junk. You would not love the result. To quote the Supremes: “You can’t hurry love.” And we haven’t even reached the parts where most of the time goes. Stay tuned.
11. So far, we’ve covered the basics. Now the hard part begins.
Yes, I’m serious. The part we covered usually takes a week and a half to two weeks. Making it exactly right will take longer.
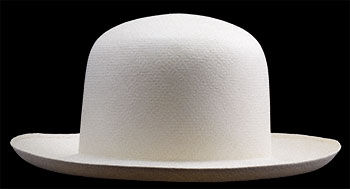
The hat to the right has been blocked on a simple dome block. The brim has been flanged. This is a good beginning. But there is much yet to be done.
Some hats must go onto a second block in order to get the shape that defines the style. This Havana-Fedora-to-be was first a simple dome.
The simple dome will remain a simple dome until I am satisfied that the size is exactly right.
My hats are custom sized to the nearest one-eighth inch. Hat blocks are sized in increments of three-eighths inches. What if your size is in between block sizes?
Well, I could block it to the larger size. Then squeeze it in to fit the sweatband. I could block it to the smaller size. Then try to squeeze the sweatband into the hat. Neither alternative works for me. I want the hat to be exactly the right size, so that the sweatband fits inside evenly, without gaps or squeezing.
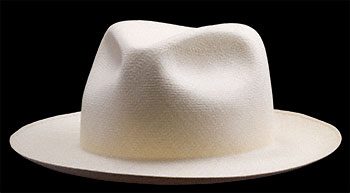
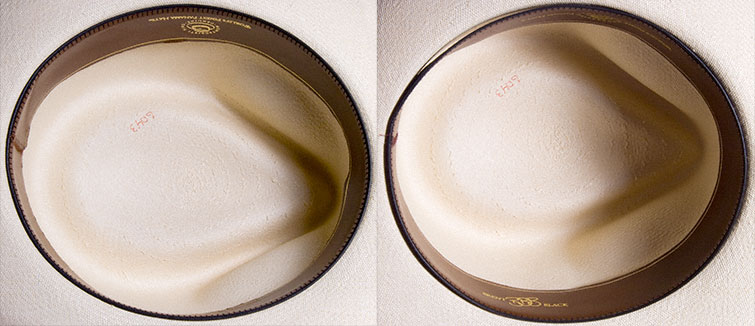
The Classic Fedora above has a leather sweatband in it that fits exactly right. It is not sewn in. It is just placed inside to test the size fit. The same size test bands that I send to clients are used to test the sizes of the hats to make sure they are exactly the right size before the sweatband and ribbon are hand sewn to the hat.
The same Classic Fedora now has a sweatband in it that is one-eighth inch smaller than the one in the photo to the left. If you look carefully at the upper left part of the sweatband, from 10 to 11 o’clock were the hat a clock face, you will see a small gap between the sweatband and the hat.
If the requested size is 22¾ inches, the hat is perfect. If the requested size is 225⁄8 inches, I have more work to do.
Yes, I’m that fussy.
How do I do it? How do I persuade a hat to become a precise size for which I have no correspondingly sized block? Not telling.
Oh, another variable. Some hats hold the size of the block, some contract inward as soon as they are off the block. Some do, some don’t. Good joke. Now what? Do I put the hat back on the block and try again, or put a different hat on the block? Maybe both.
These are the times that try men’s souls. I’ve been tempted a time or two to offer mine for sale…if I could just get that little ripple out of the back of this fedora brim. Yeah, it really gets like that. What do you do when you see a ripple? You smooth it out, iron it out, sandbag it out. But what if it still won’t come out? Hang yourself. Less painful than going on.
I sometimes spend another two weeks, or more, fine tuning the details before a hat is ready for ribbon and sweatband. That bears repeating: I sometimes spend another two weeks, or more, fine tuning the details before a hat is ready for ribbon and sweatband.
Keep this in mind when you receive and try on your size test bands to choose your perfect custom fit. I ask you to spend ten or fifteen minutes to decide a size that I may spend a month or more to achieve. So if you just blow it off and then call to tell me your new hat falls down to your ears when you put it on, okay. Let’s start over with the size thing. You send me the hat. I send you more size test bands. Maybe try them on this time. It’s a simple thing. It’s your hat. Think about yourself, be selfish, figure out what’s perfect for you.
I will invest far more time than is reasonable to make your hat turn out just right. Montecristi hats are unpredictable and unfaithful. They can take some time to persuade. Work with me here. Give the size test bands your serious attention. I know you expect me to give your hat my serious attention.
Also, please allow me the time to get it right. Sometimes it takes a totally irrational amount of time. If I am dissatisfied at any stage of the process, I may decide to start over. I may start over with a different hat. I may re-do the same hat. I may do both. I have something in mind. It is easier to think it than to find a hat that will agree to be it.
I keep on keepin’ on until I think I have it right. My name is in my hats. They are blocked with my hands. That’s important.
If you want to complain about, or praise, a Brent Black hat, Brent Black is who made the hat, Brent Black is who answers the phone. You have a problem with a Stetson, good luck trying to find someone named Stetson to talk to. Know what I mean?
12. Sew, sew, sew your hat, gently ’round the brim
Sooner or later, I persuade your hat to be exactly the right size. Everything measures as it should. Joy reigns throughout the land. Celebratory music is sometimes played. Dancing may occur.
While I have been blocking your hat, your sweatband was made to size. I then use your actual sweatband, instead of a size test band, to verify that your hat is exactly the right size.
Your sweatband is sewn into your hat by hand, using very thin needles and fine silk thread that has been waxed with beeswax. Why do we use such special thread. Well, I wouldn’t mind telling you, but as for my competitors (many of whom seem to read my site regularly), it’s none of their beeswax. Do kids still say that? Probably not.
I shudder every time I take the sweatbands out of other hatters’ hats. Most of them sew the sweatbands in with a sewing machine and thick cotton thread. They have punched big fat holes through the straw all around the hat. I hate that. Lazy. Destructive. Makes re-blocking such hats a very risky proposition. Just tear along the dotted line. I am extremely reluctant to accept such hats for blocking. When pulling them onto the block with the boomerang-shaped puller-down tool, I have had the entire bottom part of the hat just tear off in my hands. That’s not right.
Our sweatbands have a little seam where they are joined in the back, and that seam is sewn with a sewing machine. Nothing else is sewn with a sewing machine. Oh, wait, for legal clarity, when the sweatbands are manufactured, there are parts of them that have been sewn by machine. But my Montecristi hats themselves have never experienced a sewing machine, never. Everything by hand. Sure, it takes a lot more time, but it’s better for the hats, and getting the hats to be the best they can possibly be is my #1 priority. Always.
Our bows are shaped by hand. Even the little part that wraps around the center of the bow, called the keeper, is shaped and sewn by hand. I’ve seen Borsalino hats with the keepers fastened with a staple!!! I am serious. A Borsalino Montecristi hat that retails for about $1000, and the bow is stapled in back. Shame. Maybe they stopped doing that. I hope so.
I have seen other Montecristi hats with staples. I have seen Montecristi hats with the ribbons glued on. I have seen some horrifying sights. Sometimes in hats from brands that are global icons, sometimes in hats from the “best” hand hatters in the US.
Do I think my hats are the best-blocked, best-finished Montecristi hats in the world? I honestly don’t know. I’m sure there are great hatters I’ve never heard of, never seen their work. Am I satisfied that my hats are the best they can be? Never. As long as I keep doing, I will keep learning, and I will keep striving to make the best-blocked, best-finished Montecristi hats in the world.
When I first began my love affair with Montecristi hats more than two decades ago, I talked with a hatter who had been blocking Montecristi hats for a couple of decades before I even knew what they were. I have great respect for his skills and talent. He represented himself to be the world’s leading authority on Montecristi hats. Okay. Glad I found him. What did I know about hats? I was an advertising creative director who had gone to Montecristi on an adventure vacation no one else cared to share. Ever traveled alone and tried to do business without either party speaking the language of the other? I was in no position to claim knowledge of anything.
He had seen the hats I bought on that first trip to Montecristi. I asked him to teach me more about the hats, teach me to choose better hats, teach me everything. He erupted a stream of refusals. Won’t teach anyone anything about anything. Whoa. Hadn’t expected such an extreme reaction. I didn’t want the formula for Coca-Cola.
Eventually, he calmed down and his breathing returned to normal. “I won’t teach you anything. But I will tell you one thing. The hats you brought back from your first trip are some of the best I’ve ever seen.”
Good start. Two decades later, I’m still learning. Does anyone know everything there is to know about diamonds? Not likely. I don’t expect to know everything there is to know about Montecristi hats. Not ever. Not even if I keep buying them for another two decades. As the great explorers of the 16th century learned, you don’t ever reach the end, there is always more beyond. If you’re willing to go there.
13. The toughest test of all.
The hardest test to pass might be the photo test. I photograph as many hats as possible before I send them away. I am proud of my hats. I hate to give them up.
A photographer learns to scrutinize details that one might not see otherwise.
I remember a particular photo shoot for a very high-end resort hotel restaurant in Hawaii, back when I was an advertising creative director. We worked long days, every day for more than a week, to photograph three plates of food.
The head chef, back in the restaurant, could not imagine what the hell we were doing that could possibly take so long. He came to the studio to see for himself. He watched for a couple of hours, was amazed by our attention to detail and subtleties, thanked us, and went back to the restaurant, where he would obsess over details that were crucial to him and meaningless to us.
Fussing over details is not a new thing for me.
If a hat does not look perfect enough to photograph and show off to anyone who will look, then it is not yet right. Many a hat goes back to the studio for a little more work during the photography stage.
Sometimes when I’m packing a finished hat to ship, I see something I don’t like. Whatever it is, it has to be fixed, even if that means starting over from the beginning.
I apologize for the delay of course. Yes, it should have been perfect the first time. I’m hoping to become perfect this year. It has eluded me so far. If you have advice which will hasten my journey toward perfection, I will welcome it, and will give it every bit as much consideration as it deserves.
Meanwhile, I will slog on, doing my best to do my best. It is very hard work. Often frustrating. Sometimes infuriating. I am not an easy guy to work for.
A travel writer of note watched me block hats for a week, then observed:
“Mate, you aren’t chargin’ enough.”
|
RETURN TO HOME PAGE Home Page |

|
